


Why should you create a custom domain name?
- Brand identity: A custom domain name is essential for a consistent online brand identity. Visitors will expect your domain name to match or resemble your company name.
- Credibility: A domain name that aligns with your company name (or your own name) establishes credibility, and makes your website appear legitimate to users.
- Memorability: If your domain is easy to remember, visitors can easily enter it into their search bars, resulting in more direct traffic to your site.
- Differentiation from competitors: A clean, catchy custom domain sets you apart from competing sites with clunkier domains.
- Search authority: In addition to strengthening your brand, custom domain names can also help you establish search authority. As a rule of thumb, the older a domain is, the more authority it has in search. That’s because it’s had time to accumulate quality content, internal links, and backlinks.
What is a custom domain name?
A custom domain is a unique branded label that's connected to the IP address of a website. To visit a particular site, you can type its custom domain name into the address bar of your browser. HubSpot’s custom domain, for example, is hubspot.com.
How to map a custom domain name with your personal blog on hashnode?
For this example, i have a domain purchased from Godaddy. You can use any domain purchased from any domain name provider. I am assuming you already have a domain name, if not, you can purchase it.
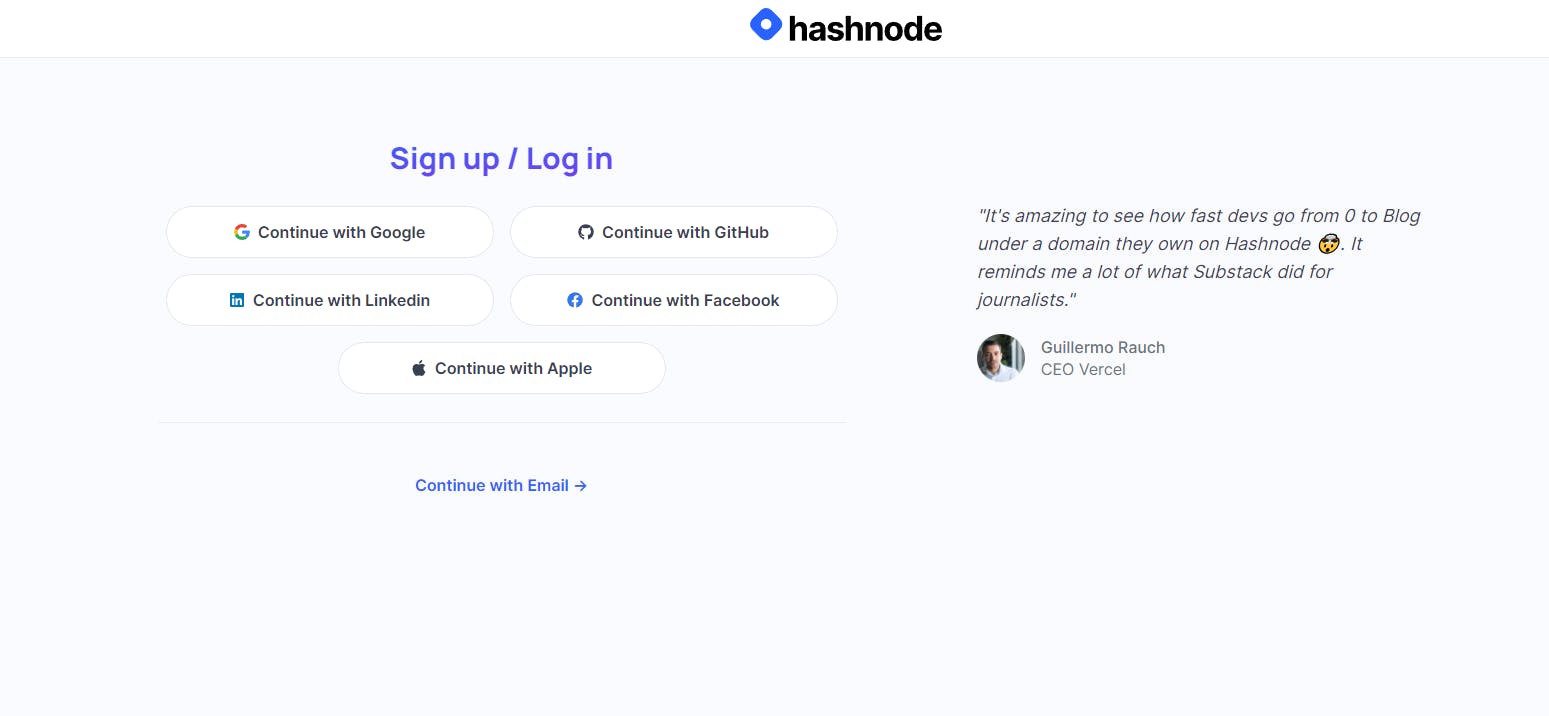
First step is to register yourself on hashnode which you can do by visiting Hashnode Login page. Upon login, you can select the prompts according to your likes and dislikes or skip it entirely.
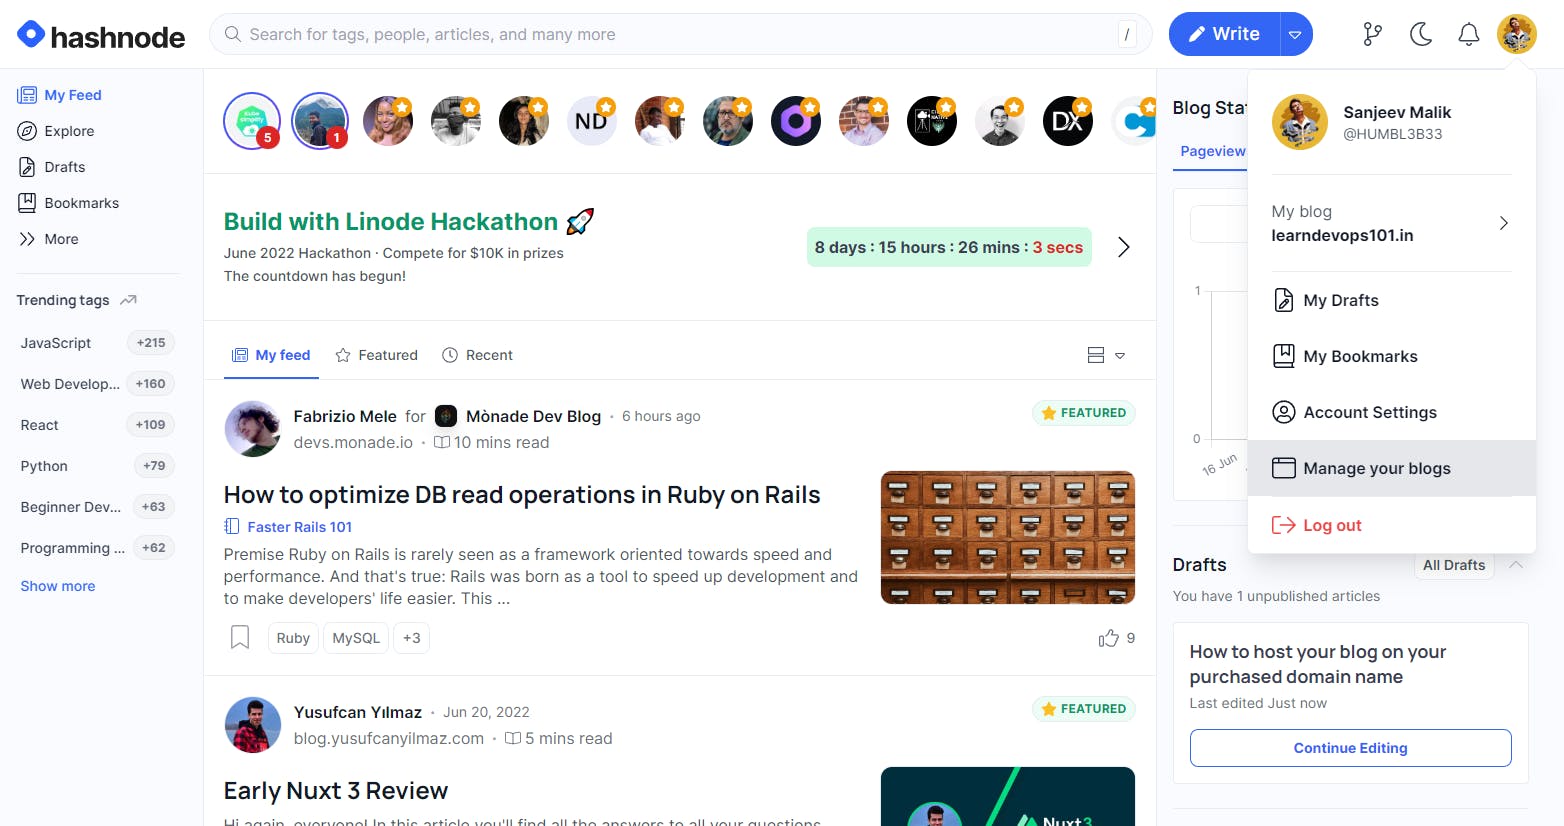
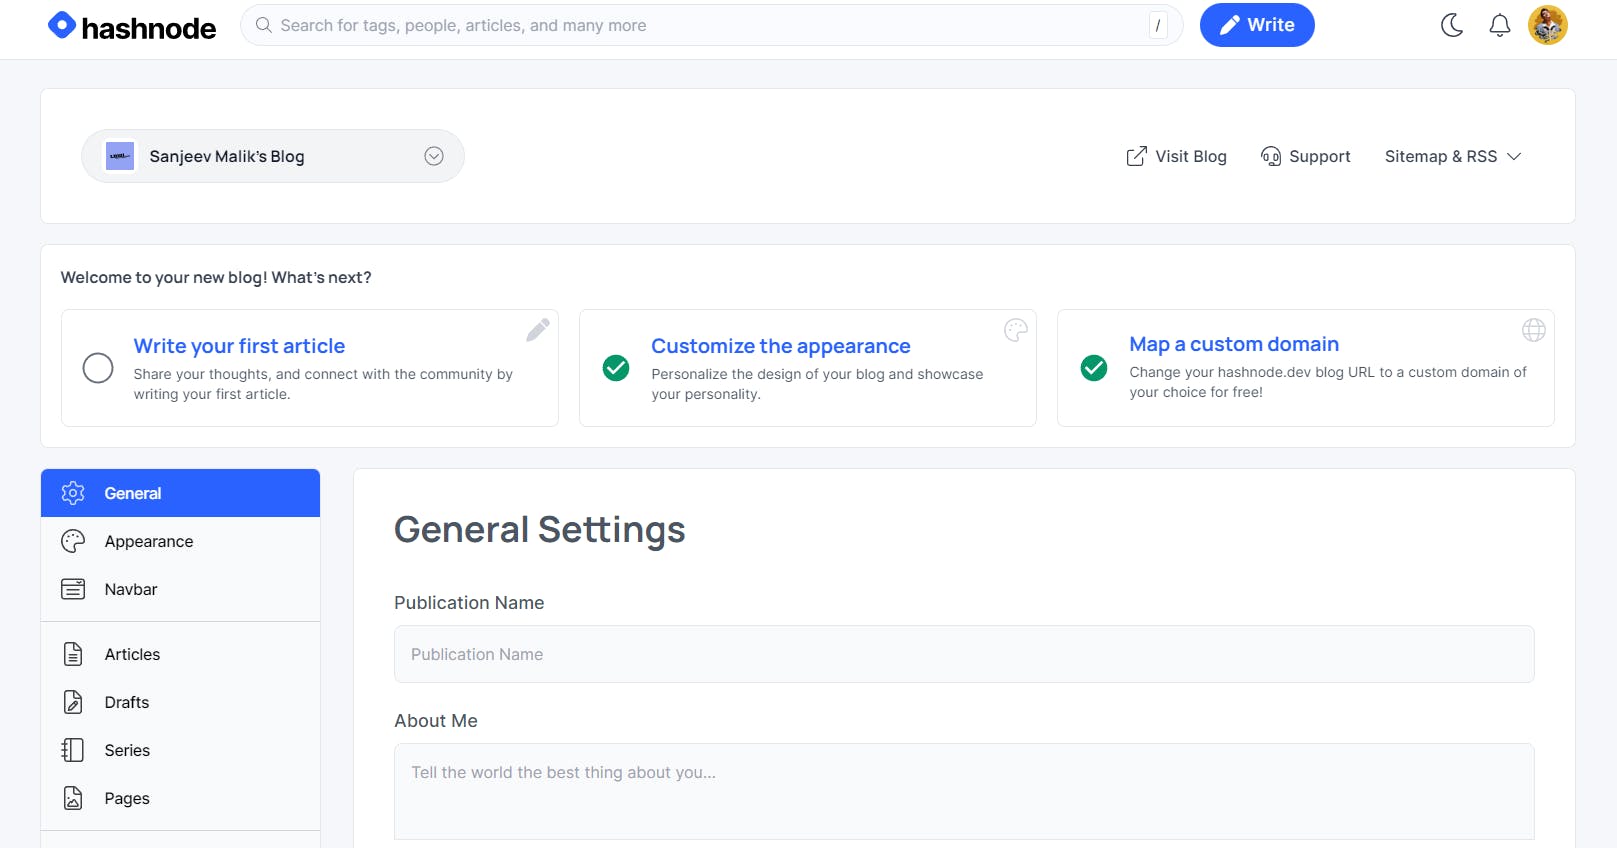
Once logged in, you can see your profile picture on the top right, Click on it and click on manage-blogs/account-settings.
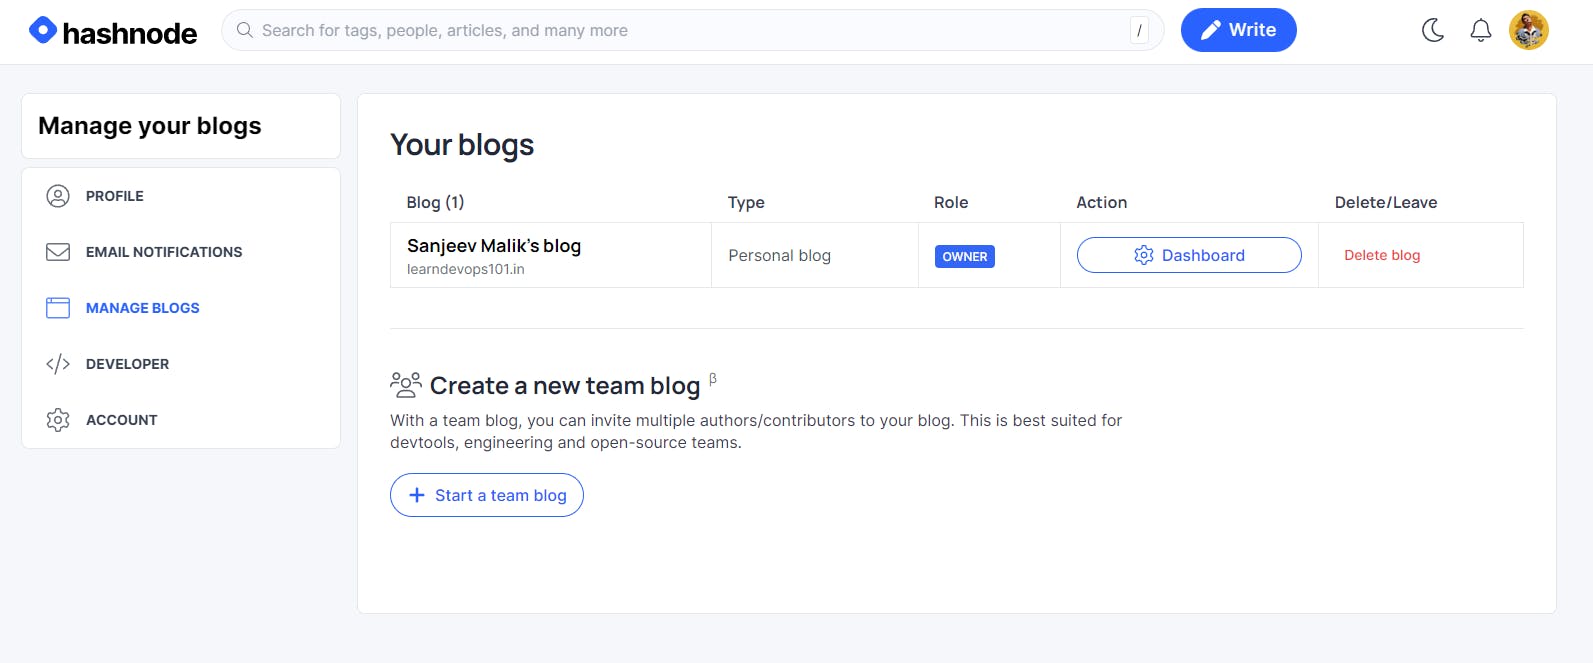
Click on start a blog and give it a nice name.
Once you have a blog set up. You shall receive something like this. Click on the Dashboard button and visit the dashboard.
Upon reaching the dashboard you will see an option to map a custom domain, click on it.
Now, we have a blog set up but it is hosted on a hashnode subdomain and we are now going to redirect that to our very own purchased domain. Under the domain section you will get an option to mention the existing domain.
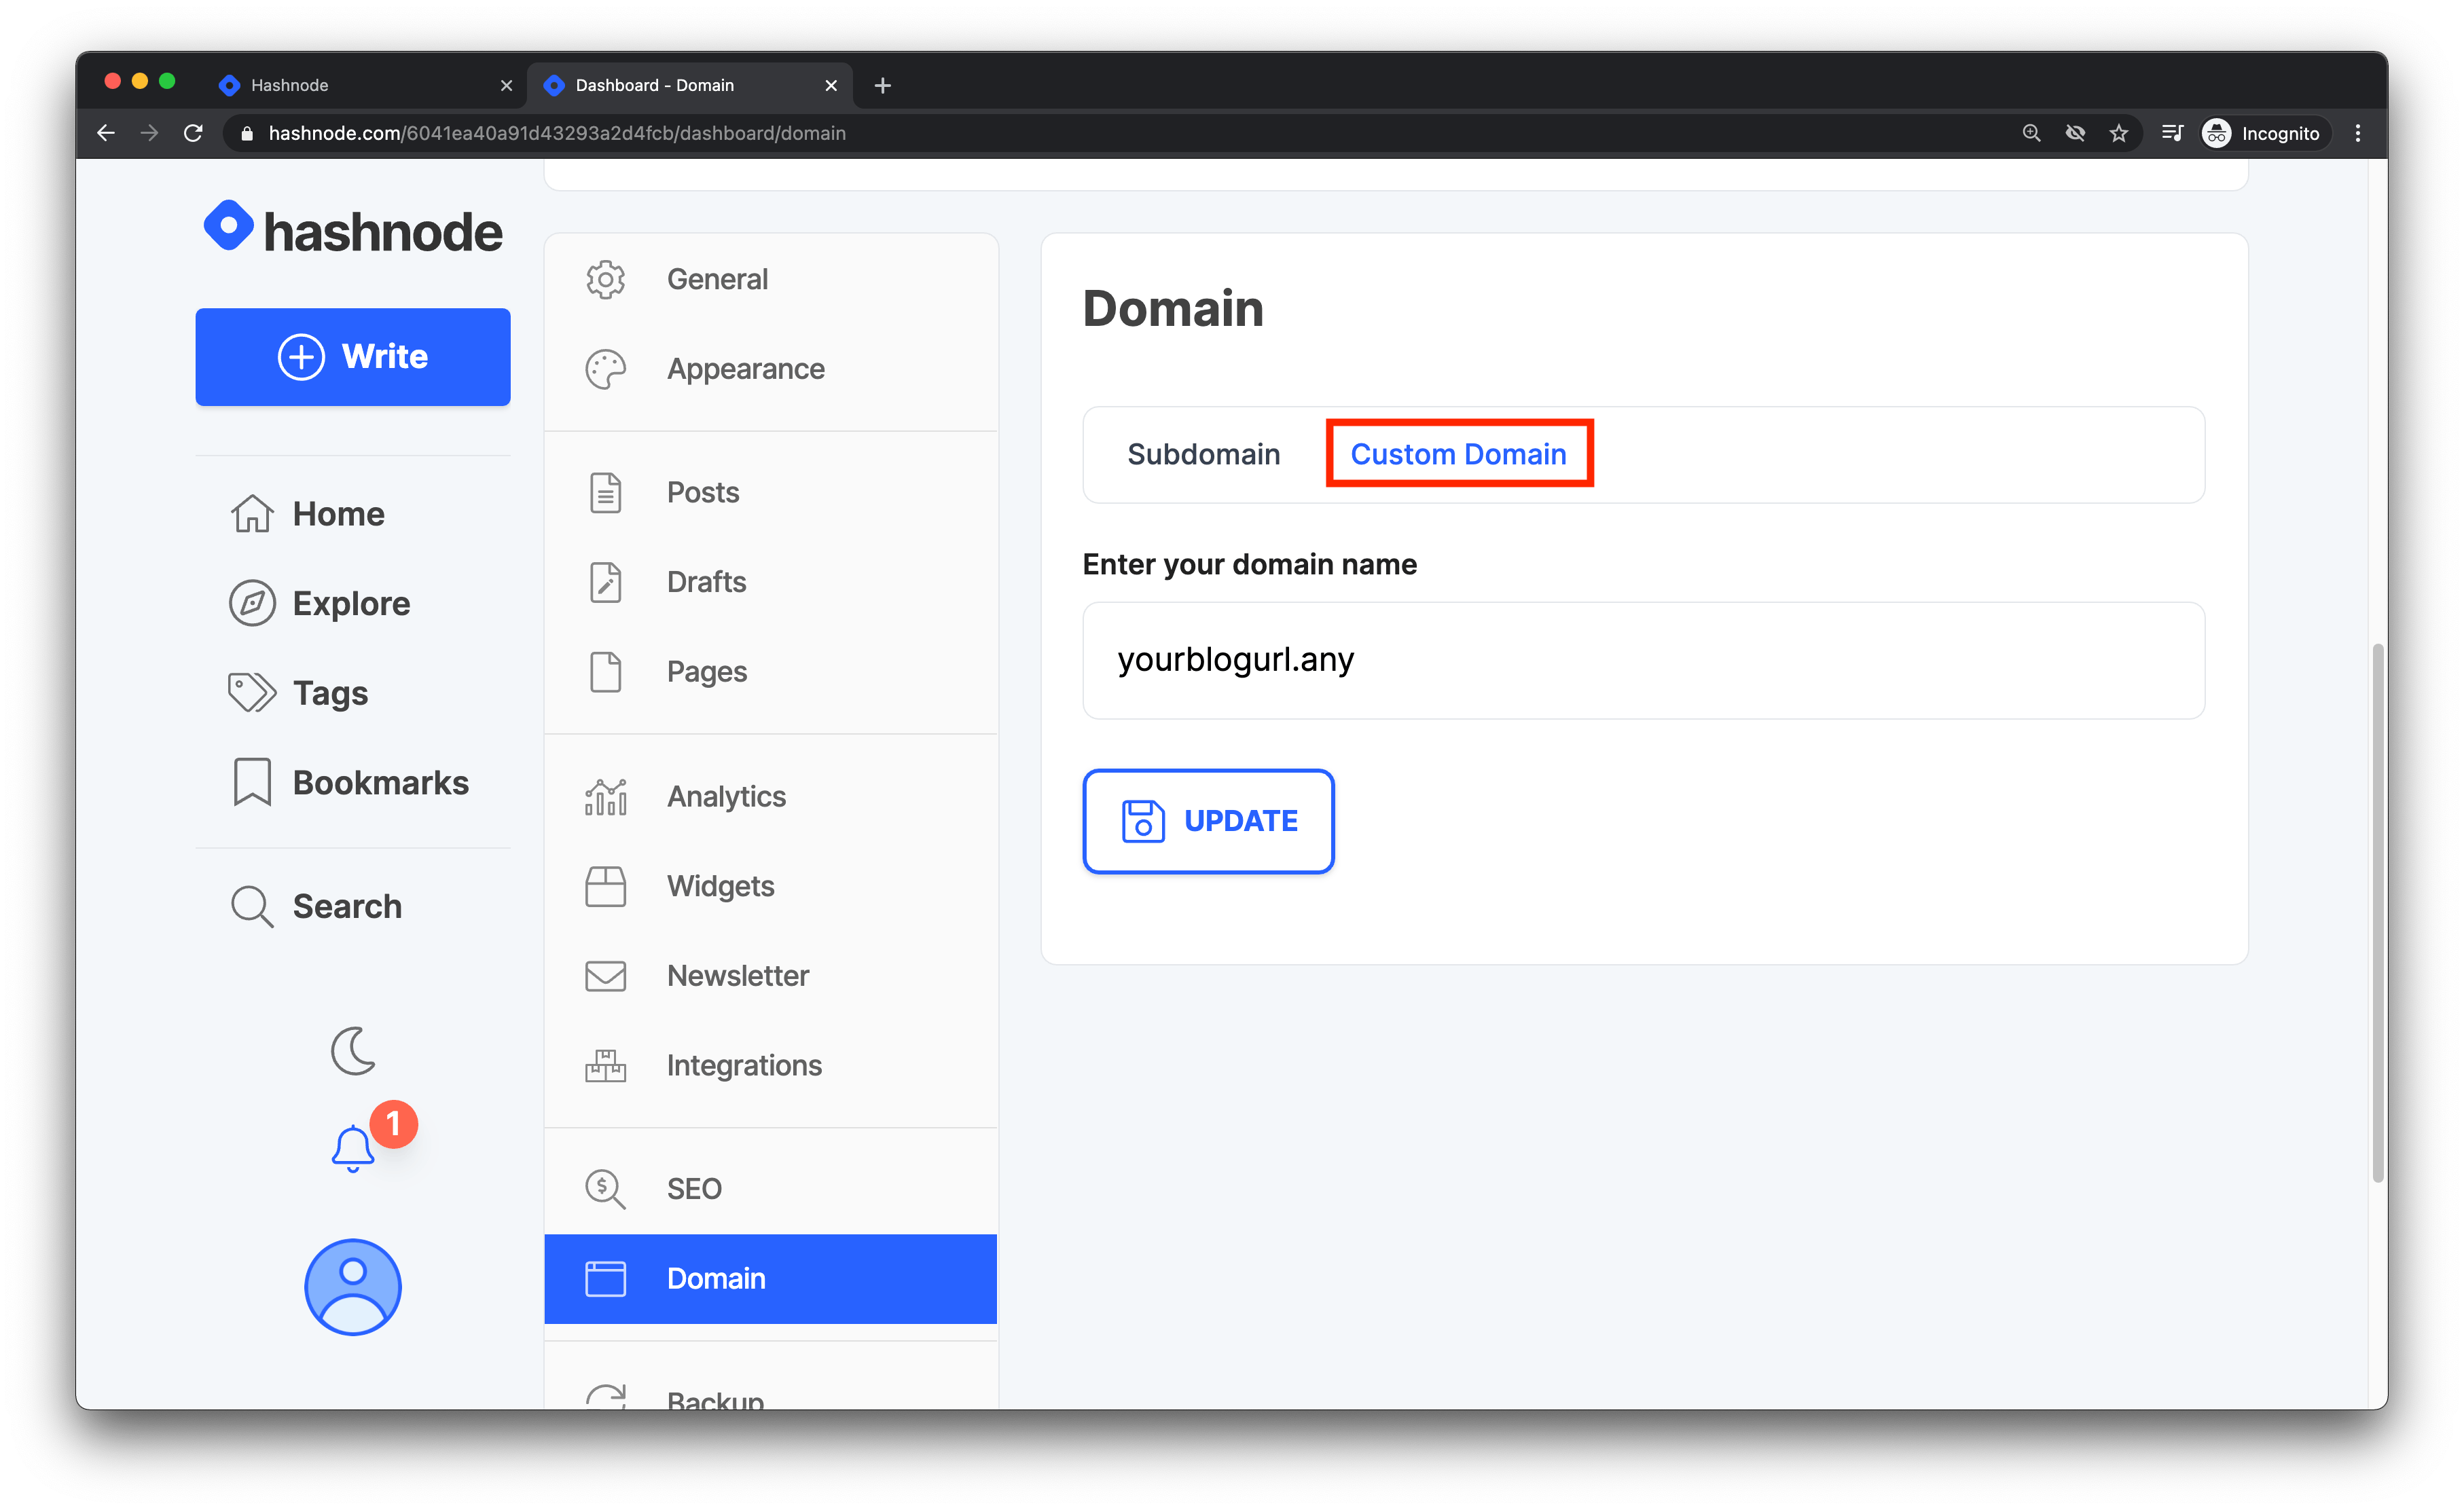
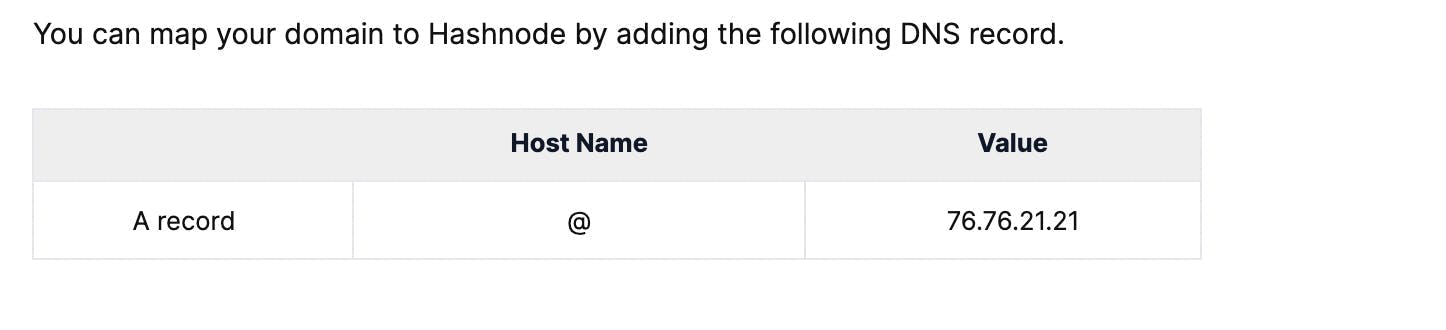
Here, you can either choose CNAME entry in your DNS registry or an A record.
With a CNAME you will have to mention the hostname and a value, but with an A record you have to provide an IP Address to reroute the traffic to your domain.

We are done with the hashnode part. Now we will move onto our domain provider, for me it is godaddy.
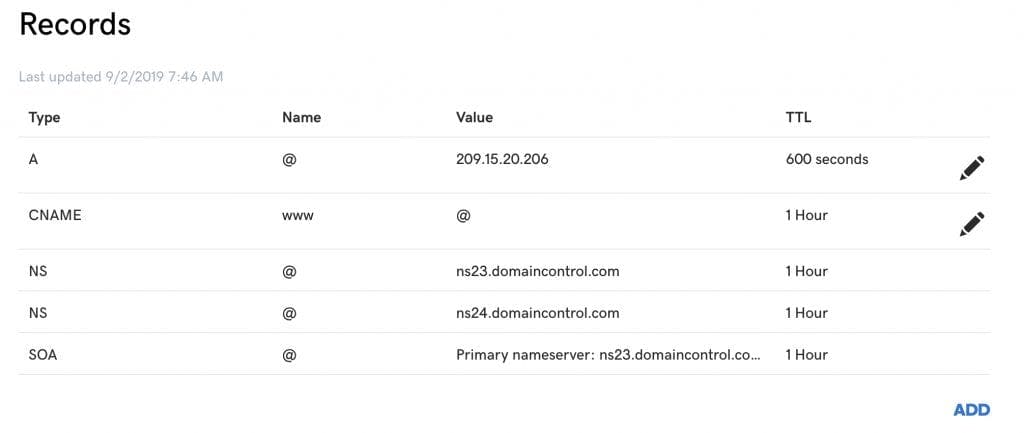 Moving into the godaddy find your domain in the admin center and click on DNS management. You can refer to this link for more knowledge.
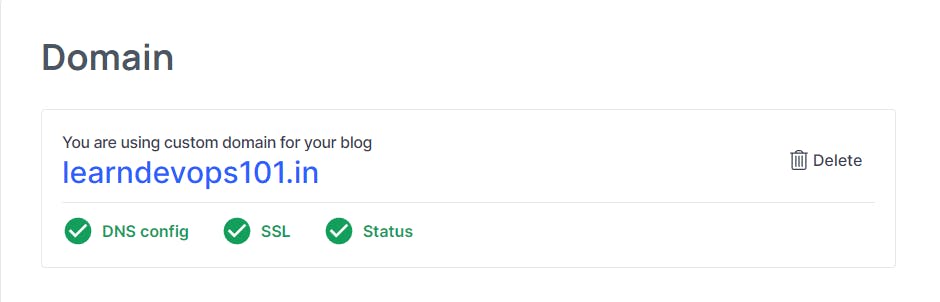
Upon adding these entry navigate back to your hashnode dashboard and refresh domain name added before DNS entry was made.
Sources: Hubspot